
PrestaShop multistore lets you run several front offices from one Back Office – different domains, themes, catalogs, or regions without installing a separate shop for each brand. This guide covers enabling the feature, adding shops and URLs, choosing what to share, and editing products in the right shop context.
Multistore (sometimes labeled Multishop) has been part of PrestaShop since 1.5 and still ships on current versions, including 8 and 9. Official steps for turning it on live in the PrestaShop 9 multistore docs. Before you flip the switch on a live catalog, take a PrestaShop backup – shop context mistakes are hard to untangle after mass edits.
When PrestaShop multistore is the right tool
Use one installation with multiple shops when you need shared staff and one admin, but separate storefronts. Typical cases:
- Several brands on one hosting stack, each with its own theme and catalog slice.
- Country or language shops with different prices, carriers, or legal pages (languages alone can stay on one shop with localization – multistore is for stronger separation).
- B2B and B2C fronts that must not show the same prices or products.
Skip multistore if you only need a second language or currency on the same domain – shop languages and currencies handle that with less complexity. Multistore adds shop context to almost every BO screen; plan for that overhead.
Enable PrestaShop multistore
In the Back Office:
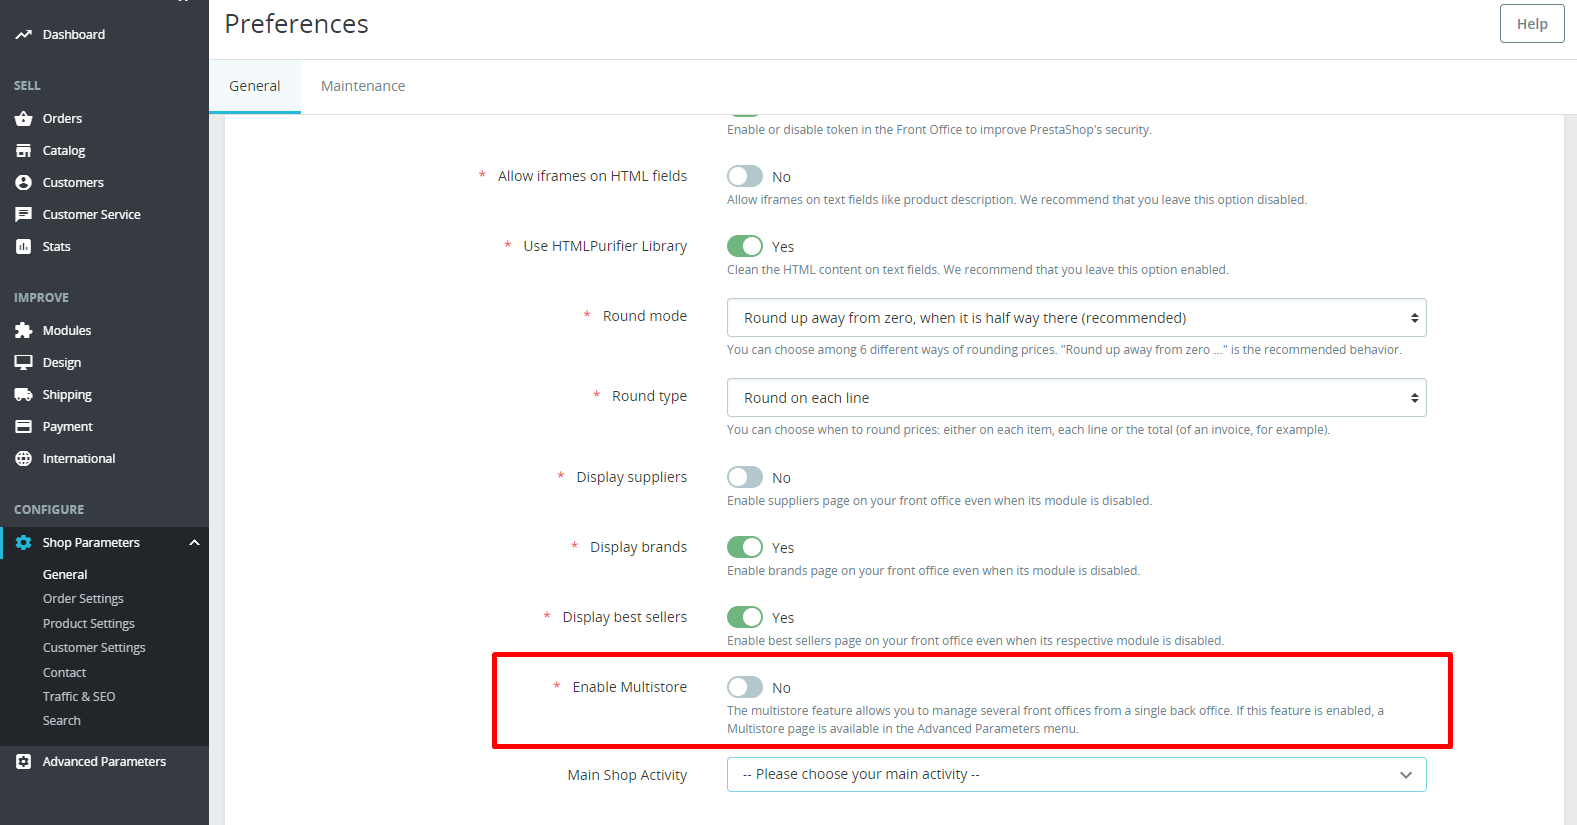
- Go to Shop Parameters → General.
- Set Enable Multistore to Yes and save.
- Open Advanced Parameters → Multistore (the page appears only after enable).
That Multistore screen is where you create shop groups, add shops, and attach URLs. Until at least one extra shop URL is configured, the feature is on but shoppers still hit a single front.
Add a shop, group, and URL
From Advanced Parameters → Multistore, use Add a new shop. Give it a clear name, pick a shop group, then open the shop’s URL settings.
Each shop needs a unique URL: a full domain, a subdomain, or a subdirectory of the main domain. Point DNS and the web server at the same PrestaShop document root for domains and subdomains; for a subdirectory, follow PrestaShop’s URL rules so rewriting stays consistent. If storefront links break after you add a domain, check PrestaShop SEO URL rewriting before blaming multistore itself.
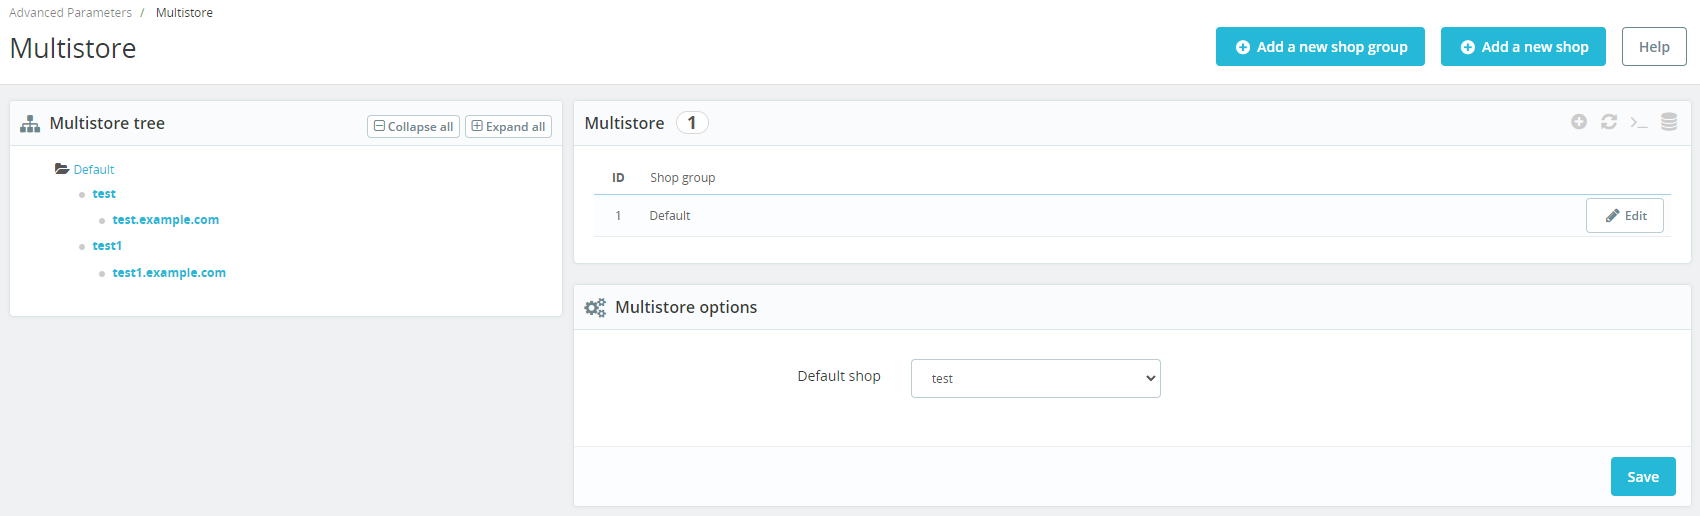
Shop groups help when you run many virtual shops. Inside a group you can share customers, orders, and available quantities. Sharing stock and customers across shops sounds convenient, but it also couples returns, promotions, and inventory surprises – start with separate groups unless you truly need shared stock.
Shop context: edit the right catalog
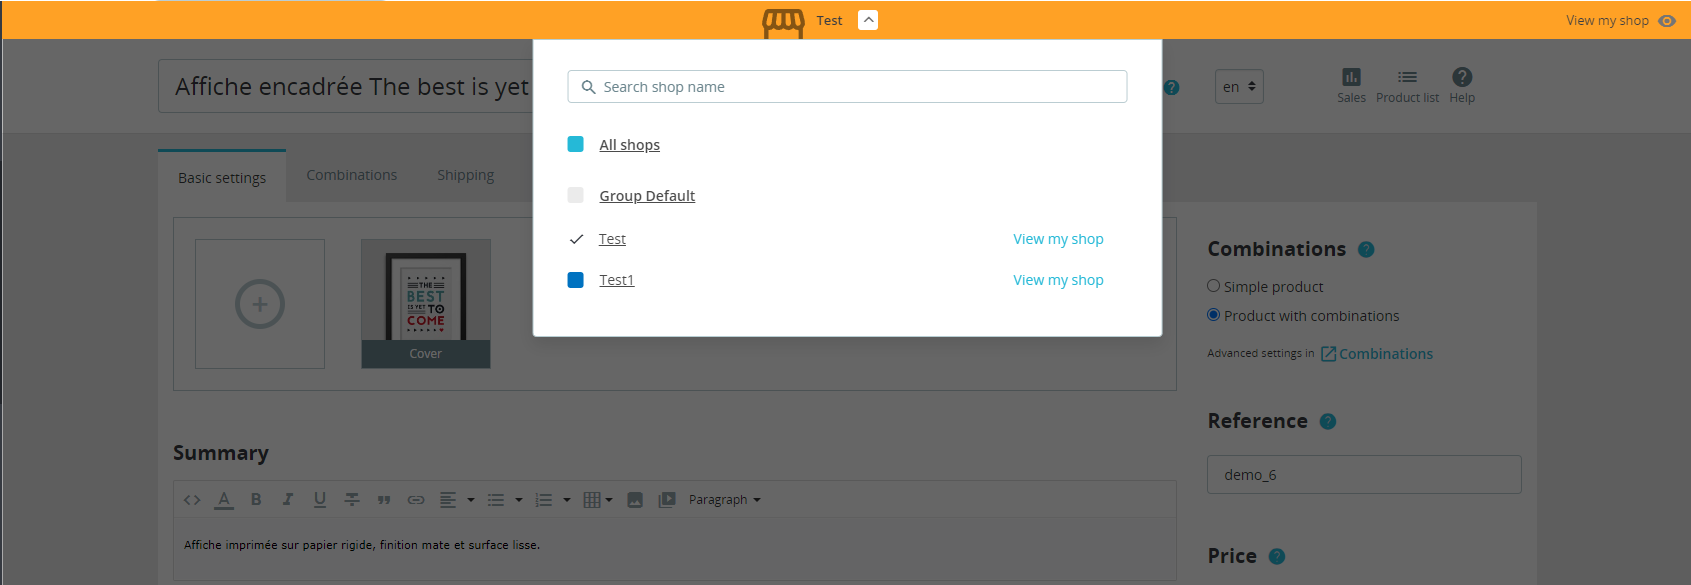
After enable, a shop selector appears at the top of the Back Office. Always check it before you save products, modules, or themes. You can work in:
- All shops – changes aimed at every shop (use with care).
- A shop group – applies to shops in that group when the field supports it.
- One shop – safest default for price, description, and visibility edits.
Example for products:
- Open Catalog → Products.
- Switch the top selector to the shop you mean to edit.
- Edit fields that should differ per shop (price, quantity when not shared, short description, active flag). Many fields can be set per shop, per group, or for all shops – watch the context icons on the product form.
Orders and customers stay per shop by default (unless your group sharing settings say otherwise). You still see them from the same BO, filtered by the active context.
Multistore is flexible, not “everything shared.” Plan per shop:
- Often shared: employee accounts, some modules installed once, warehouse logic when you intentionally share stock.
- Often per shop: theme, homepage, CMS pages, carriers, payment display, category trees you want isolated, catalog prices.
- Modules: enable or configure per shop when the module supports it – do not assume one config fits every front.
SSL certificates must cover every domain and subdomain you attach. Cookie and session issues after adding a second domain usually mean the shop URL or SSL settings do not match what browsers see.
PrestaShop multistore checklist
- Backup the database and files first.
- Enable Multistore under Shop Parameters → General.
- Create the shop (and group) under Advanced Parameters → Multistore.
- Attach a unique URL; verify DNS, vhost, and HTTPS.
- Test the storefront on that URL in a private window.
- Edit products and modules only after confirming the shop selector.
- Decide deliberately whether the group shares customers or quantities.
- Re-check friendly URLs if links 404 on the new domain.
Once that checklist is green, day-to-day work is mostly discipline: pick the shop context, save, then spot-check the matching front office. That habit matters more than any single Multistore screen.