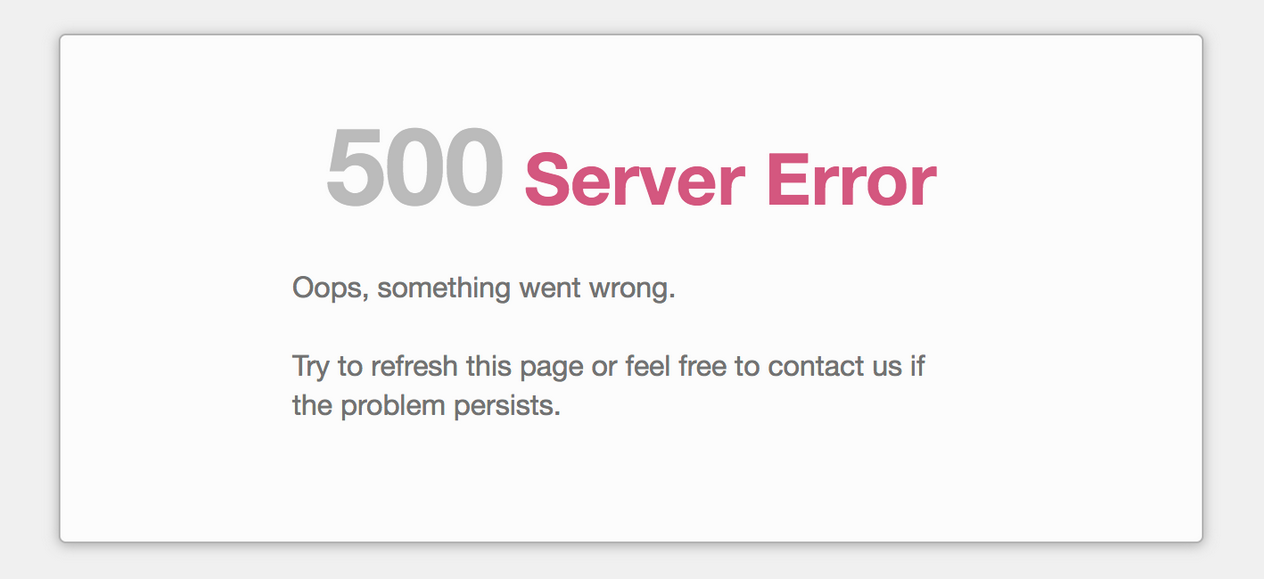
One of the most shocking issues you may encounter with PrestaShop, or indeed any PHP-based platform, is the infamous “White Screen of Death” (WSoD). This happens when you attempt to access your site, only to be met with a completely blank, white screen. No error message, no clues, just an unhelpful void. This is often due to a PHP error or a server issue that breaks the site’s loading process.
Here’s how you can tackle the WSoD:
Step 1: Enable Debug Mode
The first step in troubleshooting the White Screen of Death is understanding that it typically stems from a PHP or database error. In PrestaShop, as with most CMS platforms, a single misstep in coding or database management can cause the entire site to crash.
Debug Mode is a PrestaShop feature that allows you to see errors directly on your site. Enabling Debug Mode will reveal the specific error causing the white screen, which will make the troubleshooting process easier.
In PrestaShop 1.7 and later versions, you can easily enable Debug Mode from your back office, and you don’t need to edit any code manually:
- Log into your PrestaShop back office.
- Navigate to the “Advanced Parameters >> Performance” page.
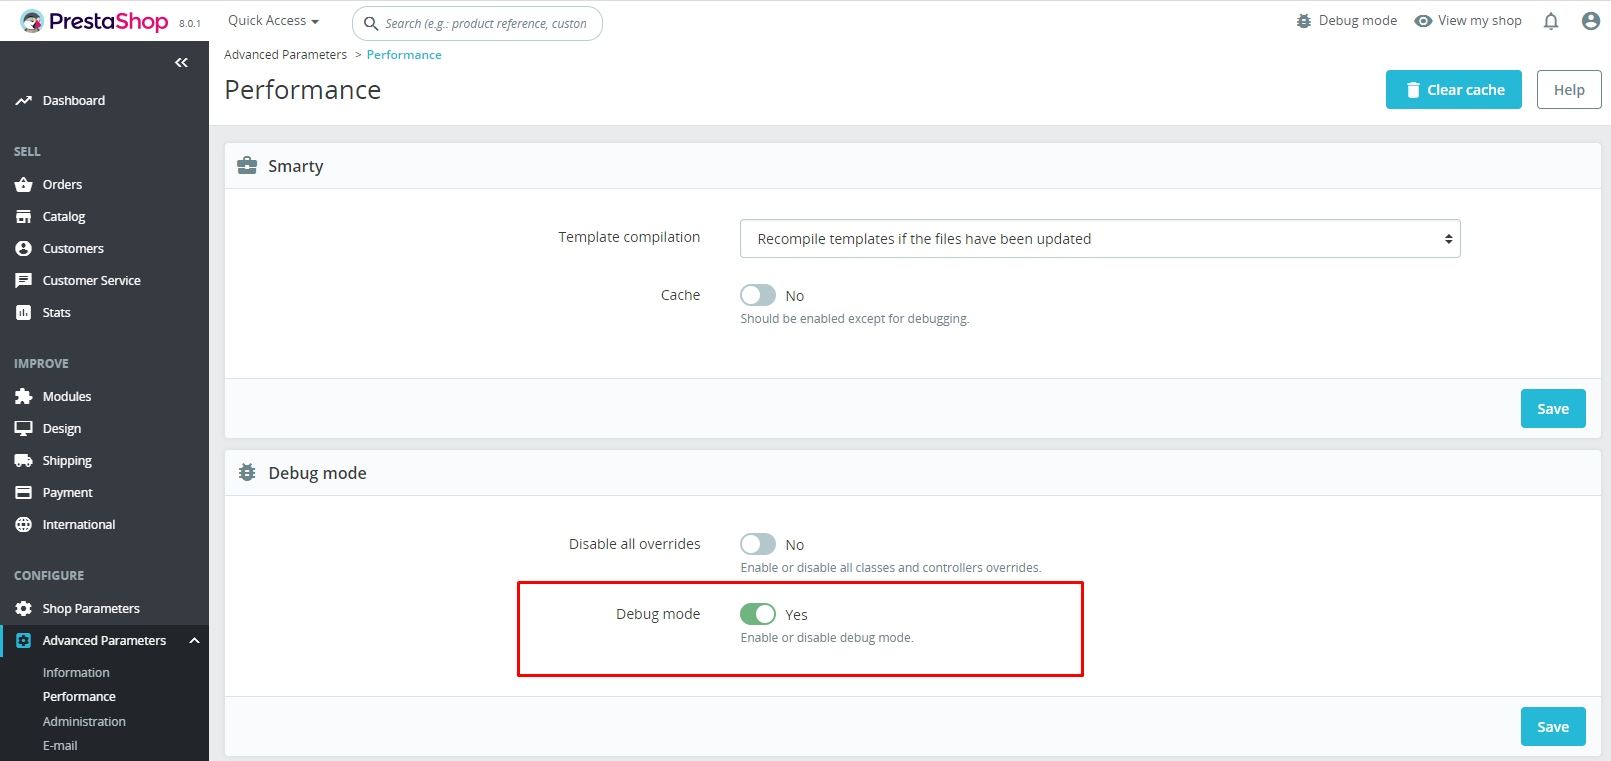
- Now, in the Performance settings, find the “Debug Mode” block.
- Switch the “Debug Mode” option to “Yes” to enable it.
- Finally, click the “Save” button to apply the changes.
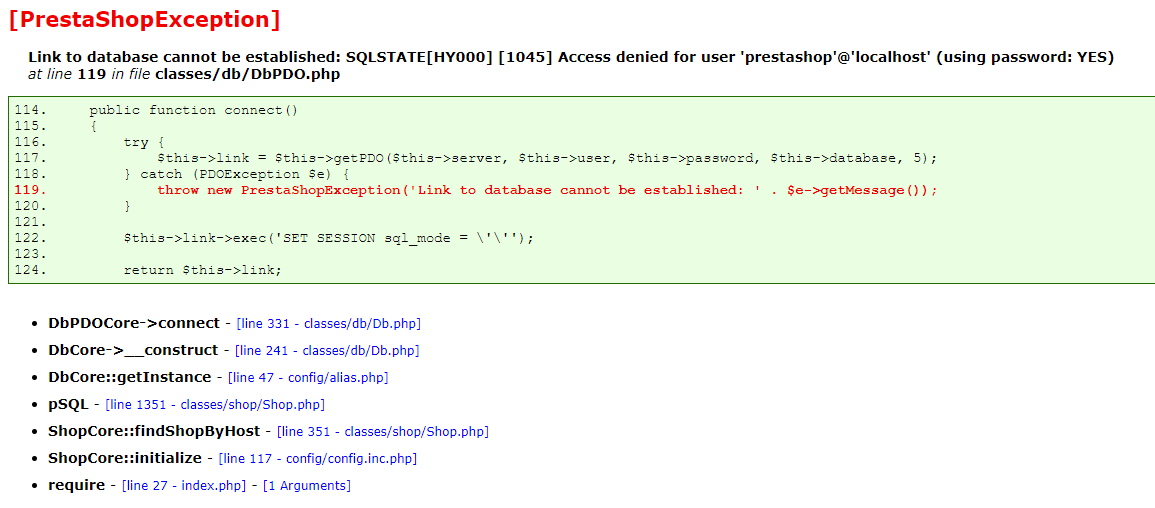
Now, when you refresh your site, instead of the White Screen of Death, you’ll see specific error messages that can guide your troubleshooting efforts. This can be highly beneficial, as it gives you a clearer idea of what you’re dealing with and how to solve it.
Step 2: Identify the error
Having enabled Debug Mode and revealed the specific error messages, it’s time to delve deeper into understanding why the White Screen of Death is occurring.
Often, the reasons for these errors are varied and might originate from different aspects of your PrestaShop management. Some of the most common sources include:
- Customization errors: It’s not uncommon for the WSOD to appear after some customizations have been made to the site. It could be changes to the theme, the addition of new elements, or even updates to existing features.
- Module bugs: Another frequent source of errors can be the modules you’ve added to your store. Particularly, newly installed ones should be under suspicion, try to disable or delete them.
- Hosting-Related errors: Changes to your hosting environment can cause a WSOD. For example, errors might appear after a PHP version change or server update.
- Database issues: If you’ve recently altered your database credentials and then encounter a WSOD, there’s a good chance the two are related. Ensuring all database credentials are correct is critical.
- Permission errors: In certain situations, WSOD can be due to a lack of correct permissions for files or directories in your PrestaShop installation.
- Memory limit errors: If your memory limit is too low, it could cause a WSOD.
- PrestaShop bugs: On occasion, the issue may not be with anything you’ve done, but rather a bug within PrestaShop itself. These can be harder to diagnose but are no less important to identify.
- Cache Issues: Sometimes, the WSOD can be a simple matter of cache issues. If this is the case, a quick solution is to clear your PrestaShop cache.
Once you’ve enabled Debug Mode and have the error message in front of you, spend time trying to understand what it’s telling you. The message is directly related to the issue causing the WSOD. By identifying and understanding the source of the error, you’ll be one step closer to fixing the problem and restoring your PrestaShop store to full functionality.
Step 3: Fix the Error
Now that you’ve identified the error, you can begin fixing it. The specific steps for this will depend on the error message you received in Debug Mode. Below are solutions for common issues:
- Customization Errors: If you’ve recently made any customizations to your PrestaShop store, these could be causing the WSOD. Consider undoing recent changes to identify if they are the root cause. Additionally, try enabling the “Disable all overrides” option under “Advanced Parameters >> Performance” in your PrestaShop back office. This can often help to address issues caused by overrides from customizations.
- Module Bugs: Try disabling or deleting any recently added modules. Remember to do this one by one, so you can identify which one is causing the problem. Try enabling the “Disable non PrestaShop modules” option under “Advanced Parameters >> Performance” in your PrestaShop back office.
- Hosting-Related Errors: These errors can occur after changes to your server settings. If you remember making any such changes or if your hosting provider has recently performed an upgrade, this might be the cause. To confirm, check the server info on the “Advanced Parameters >> Information” page. If in doubt, it’s best to consult with your hosting provider’s support team.
- Database Issues: Make sure that your database credentials are correct in your PrestaShop configuration file: /app/config/parameters.php
If the credentials are incorrect, this could be the source of the error. - Permission Errors: Locate the problematic file or folder (the error message in Debug Mode should point you to it) and adjust its permissions accordingly using your FTP client.
- Memory Limit Errors: You can increase the limit in the ‘php.ini’ file by changing the value for ‘memory_limit’ (e.g., “memory_limit = 256M“). However, for many users, the simplest solution may be to reach out to your hosting provider’s support for assistance.
- PrestaShop Bugs: There’s little you can personally do to fix these, but you can still take proactive steps by googling the issue, or searching for similar problems and solutions in PrestaShop forums or community discussions.
- Cache Issues: Navigate to “Advanced Parameters >> Performance” page and click the “Clear cache” button to do this.
Each error is unique, but by systematically addressing each potential source as outlined above, you’ll increase your chances of pinpointing and resolving the issue causing the WSOD.
Step 4: Contacting Support
If you’ve followed these steps and are still seeing the WSOD, it may be time to reach out for professional help. PrestaShop’s community forum is a good place to start. Alternatively, you could contact your hosting provider or a skilled PrestaShop developer for assistance. Provide them with as much information as possible. They have access to more detailed server logs and might be able to pinpoint the problem more accurately.
Remember, dealing with the White Screen of Death can be daunting, but it’s a common issue that many PrestaShop users have successfully resolved. By following this guide and understanding what causes the WSOD, you’ll be well-equipped to tackle it head-on.
Lastly, always remember to back up your PrestaShop store regularly. It’s a simple step that can save you a lot of trouble when things go wrong.
Step 5: Restore From Backup
If all else fails and the White Screen of Death persists, your final option might be to restore your PrestaShop site from a recent backup.
Restoring from a backup should ideally be your last resort. It’s crucial to remember that this step might lead to the loss of any data or changes made after the backup was created. Therefore, it’s advisable to try all other troubleshooting steps before resorting to this.
Moreover, the availability of a recent backup is an essential prerequisite for this step. It’s a good practice to regularly back up your PrestaShop site as part of your routine site maintenance. This ensures that you have a safety net to fall back on should any significant issues, like the White Screen of Death, occur. Having a recent backup could save you a lot of time and effort in fixing such problems and maintaining the smooth operation of your online store.