In the age of global e-commerce, having a multilingual website is a major advantage. It opens up your store to a wider audience, boosts your sales, and improves user experience. This article will guide you through setting up multiple languages in PrestaShop, a feature that allows you to better cater to your international customers.
PrestaShop is built with powerful multilingual features. It can support many languages, letting your customers navigate your online store in their preferred language. This guide will show you how to make full use of this feature.
How to add a New Language
- Log in to your PrestaShop admin panel.
- Navigate to the “International >> Localization” page from the main menu.
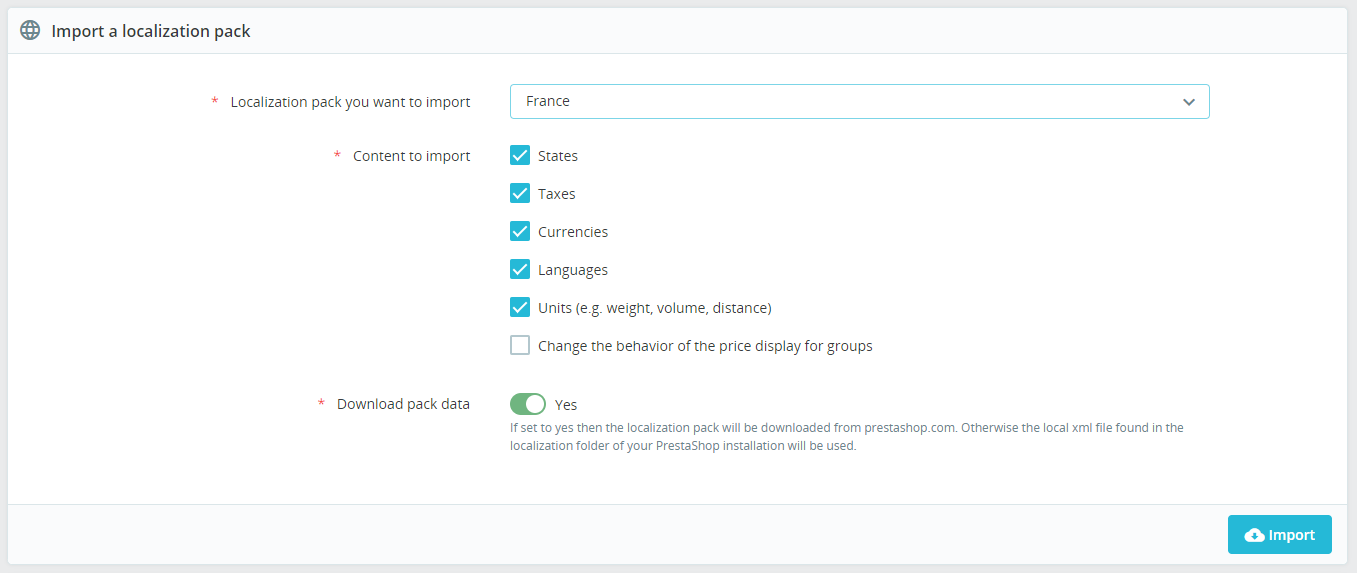
- Choose the necessary localization pack in the block “Import a localization pack“.
- You might also want to customize the “Content to import” option by selecting the necessary checkboxes. But in this example we just need “Languages“.
- Click the “Import” button and PrestaShop will import the localization pack.
Actually, you can add a language manually. In this case you need to open the “Languages” tab and click the “Add new language” option. But it’s much less convenient. It won’t download translations, etc., you’ll need to configure everything by yourself.
Verifying the Successful Import
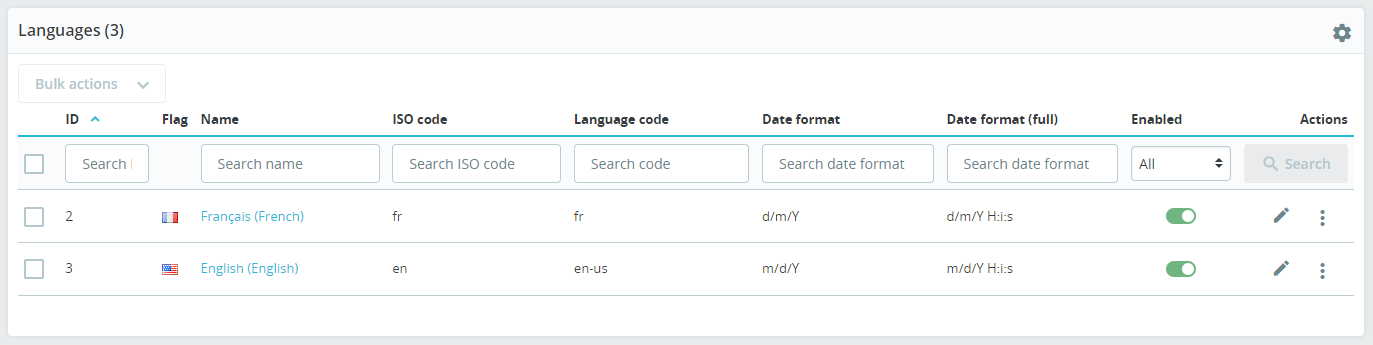
- Open the “International >> Localization > Languages” page.
- The newly added language should now appear in the list of languages.
- You might also check the Front Office. Just open your shop and switch to the new language in the language box.
How to Set Up Multi-language Content
Translating Content: Products, Categories, CMS pages
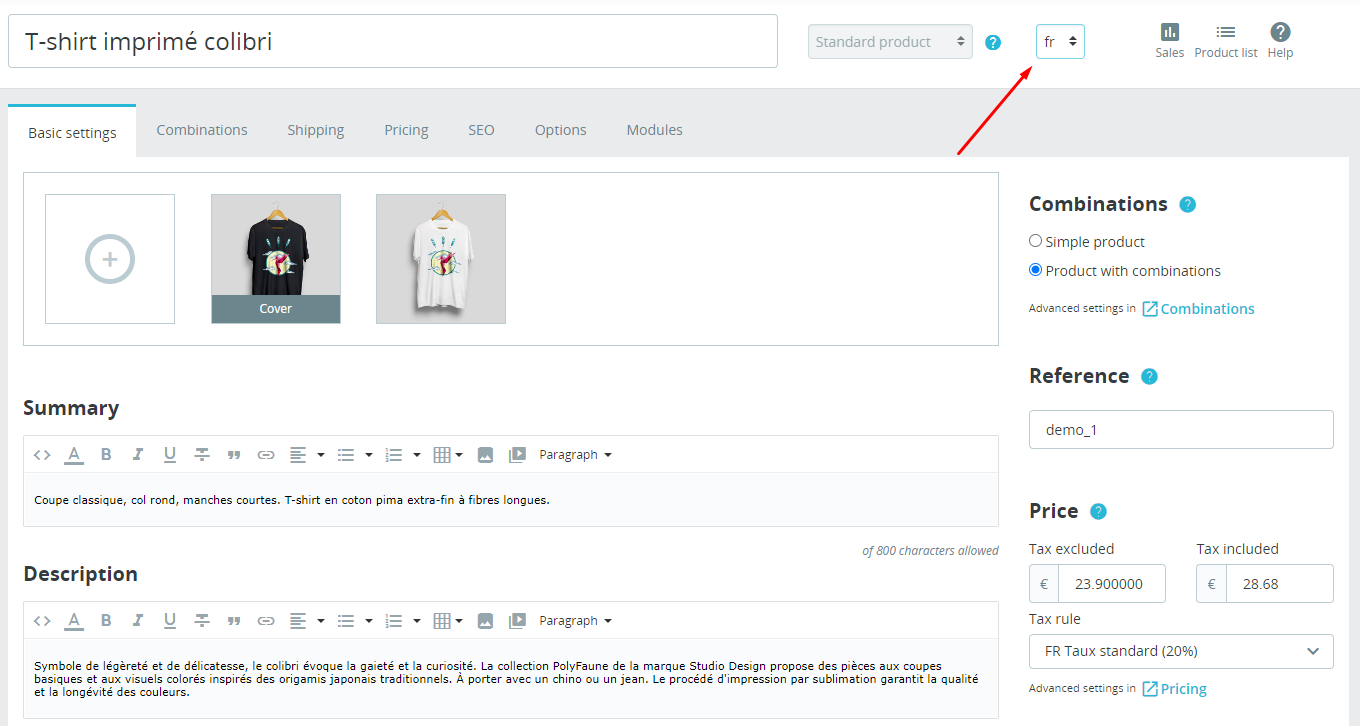
- In the PrestaShop admin panel, go to the specific form you want to translate, like a product, category or CMS page.
- Find the language select option next to the text input/textarea. Or at the top of the page in case of the product page.
- Switch to the language you want to translate to.
- Enter the translated content and save the changes.
Remember, you can do this for every element of your site that has editable multi-language content. This way, you can maintain a fully multilingual website, providing your international audience with a seamless shopping experience.
Localizing the User Interface
- Go to “International” and then “Translations.”
- Select the type of translation you want to edit (like front office, modules or emails).
- Choose the language you want to translate to.
- Click on “Modify“.
- Add your translations and save them.

Actually most themes and modules come with translations, not to mention standard PrestaShop elements. But sometimes you still need to add or edit translations.
Tips for Managing Multiple Languages
To ensure your multilingual store runs smoothly, remember to keep translations consistent. Make sure all content is translated similarly across your site to avoid confusing your customers. Additionally, regularly update your translations as you add new products and content to your site.
In conclusion, setting up multiple languages in PrestaShop can significantly boost your store’s user experience and reach. By following these steps, you can successfully set up and manage a multilingual online store. We encourage you to use this powerful feature in your PrestaShop store to reach more customers around the globe.