Keeping your PrestaShop store up-to-date is vital for smooth operations, security, and ensuring the best experience for your customers. This article gives you a clear, straightforward guide on how to upgrade your PrestaShop store safely.
How the upgrade is performed
The upgrade process in PrestaShop is performed by the “1-Click Upgrade” module. This module takes charge of the upgrade, automating most of the work for you. Once initiated, it does all the necessary tasks – from downloading the latest PrestaShop version, installing it, to updating your store’s database.
The module includes a backup feature which protects your data during the upgrade. If anything goes wrong, you can revert back to the previous state with ease.

The only alternative method would be using the command line interface (CLI) of the autoupgrade module. However, it’s recommended only for advanced users, as it requires a higher degree of technical knowledge.
1. Make sure you have a full backup of your store
Before starting any upgrade, backing up your store is crucial. It ensures you don’t lose any valuable data if anything goes wrong during the upgrade. The good news is that the “1-Click Upgrade” module by PrestaShop includes a backup feature for convenience. Don’t forget to enable it or just use your regular backup tool.

You might also want to consider using some helpful modules specifically designed for this purpose. We have a basic free backup module and a more advanced premium backup module.
2. Check your module and theme compatibility
Before upgrading, it’s important to check if your current modules and themes are compatible with the new PrestaShop version. You can find this information on the module/theme documentation or their selling pages. If they are not compatible, you might need to find alternatives or wait for the module/theme to be updated by its developer.
3. (Optional) Set up and use a test environment
A test environment mirrors your actual store, allowing you to test the upgrade before applying it to your live store. You can set it up by copying all files and the database to a subfolder, subdomain, or another domain. Remember to restrict access to search engines and random visitors. In the test environment, perform the upgrade as you would in the production store. This helps you catch and resolve potential issues before they affect your live store.
You might also consider using a dedicated module for creating a test store.
4. The upgrade process
Here’s a simple guide on how to use the “1-Click Upgrade” module:
- Go to your PrestaShop back office.
- Navigate to the “Modules >> Module Manager” page.
- Search for the “1-Click Upgrade” module and click the “Configure” button.
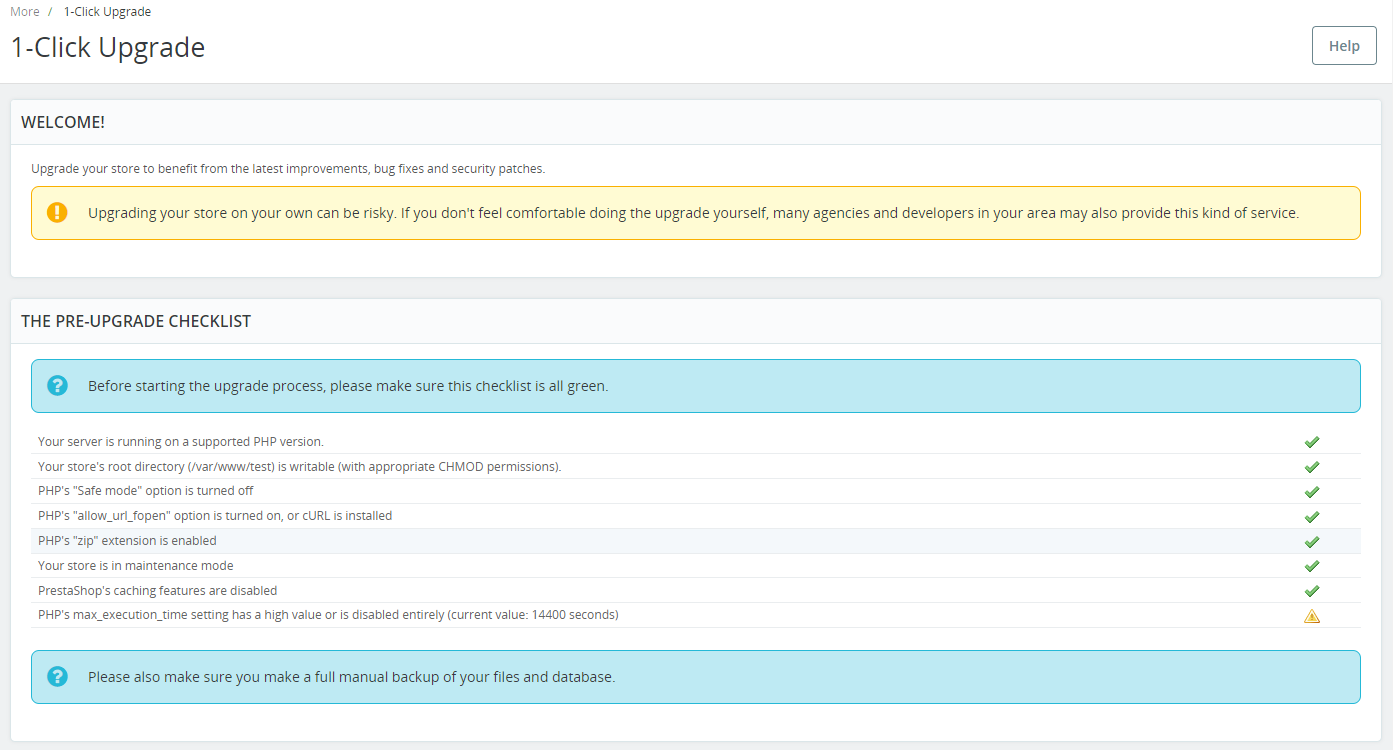
If the autoupgrade module is not installed yet, you need to find it in the catalog: “Modules >> Module Catalog” or “Modules >> Module Manager” in PrestaShop 8. Alternatively, you can manually download and install the latest version from the module’s github page: https://github.com/PrestaShop/autoupgrade/releases - Now, on the module configuration page check the pre-upgrade checklist. Make sure all the requirements for upgrading are satisfied.
- Check the autoupgrade module settings:
- Check the backup settings, they should be enabled unless you use an external backup tool
- Choose whether to disable non-native modules and overrides. They may be incompatible with the new version. You can activate these options and enable the modules and overrides one-by-one later.
- Choose whether to update your theme and email templates. If you customized them, most likely you want to keep your changes.
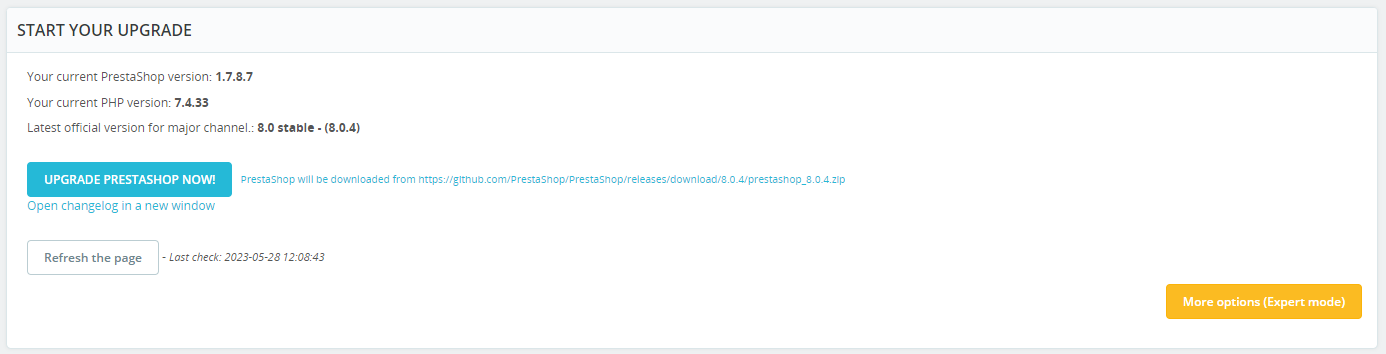
- Locate the “Start your upgrade” section and click the “Upgrade PrestaShop now!” button. If you have unmet requirements in the pre-upgrade checklist, the button won’t appear.

- Wait for the upgrade to complete.
- All done. Follow the final instructions, refresh the page.
5. After the upgrade
Once the upgrade is complete, it’s crucial to thoroughly check your store to ensure everything functions correctly. Here’s a step-by-step checklist to guide you:
- Clear the PrestaShop cache and your browser cache: You can clear your PrestaShop cache at the “Advanced Parameters >> Performance” page. Do not skip this step, it’s easy and important. The browser cache can be cleared in your browser settings or at least by pressing Ctrl + f5 (or Cmd + f5 on Mac) keyboard shortcut.
- Verify the store frontend: Start by checking the overall look and feel of your store. Are the themes and layouts displaying correctly?
- Check product pages: Navigate to different product pages to ensure they display all the necessary information, such as product images, descriptions, and prices.
- Test the search function: Enter some product keywords in the search bar to verify that it gives the correct results.
- Test the shopping cart: Add some products to the shopping cart. Is the process smooth? Does the cart update with the correct items and totals?
- Go through the checkout process: Try to make a purchase to ensure the checkout process works as expected, from selecting a product to making payment and confirming the order.
- Confirm successful transactions: Make sure the transactions go through successfully and that the payment gateway integration works fine.
- Check the customer account functionality: Log into a customer account. Check if the user can view order history, update information, and perform other account-related tasks.
- Verify the store backend: Log into your PrestaShop admin panel. Make sure all the administrative functions work correctly, such as adding or updating products, viewing reports, and managing orders.
- Ensure communication works: Check whether transactional emails, like order confirmation or account creation emails, are being sent and received correctly.
- Check the store’s performance: Does the site load quickly? Are there any broken links or 404 errors? If your store is slow or unresponsive, this might discourage customers.
6. Dealing with potential issues
When dealing with potential issues post-upgrade, it’s essential to approach them systematically to identify the cause and find a solution.
- Debug mode: If you encounter an issue, the first step is to enable the debug mode in your PrestaShop store. It’s a helpful tool that provides more detailed error messages, which can give you clues about what’s causing the problem. Check this article: How to turn on error reporting in PrestaShop
- Disabling modules: If the problem persists, consider disabling your modules one by one. Sometimes, a module might be incompatible with the new version, causing issues. By disabling them individually, you can pinpoint which module might be causing the problem. After finding the cause, check for the module updates or keep it disabled until you find a solution.
- Check theme compatibility: Similar to modules, themes can also cause issues if they’re not compatible with the new PrestaShop version. If problems continue, try switching to a default theme to see if this resolves the issues. Check for the theme updates.
- Consult documentation and forums: The PrestaShop community and documentation can be valuable resources. If you can’t resolve an issue, chances are someone else has encountered it before. Forums, FAQs, and guides can provide a lot of information and solutions.
- Restoring from backup: If all else fails and the issues are too complex or time-consuming to resolve, consider restoring your store from the backup created prior to the upgrade. It’s a safe option that ensures your store can continue to operate as you work out the issues.
Regularly upgrading your PrestaShop store is key for maintaining performance and security. By following these steps, you can ensure your store upgrade goes smoothly. Remember to back up your store, check module/theme compatibility, and use a test environment before upgrading the live store. Stay proactive in upgrading for the best store performance and security.