Importing and exporting data in PrestaShop is a really important and useful feature. It allows you to maintain, update, and transfer your shop data conveniently. You can use it to move data between different stores, update product listings, transfer customer data, and much more.
PrestaShop supports importing and exporting of a variety of data types. This includes products, categories, customers, addresses, brands, suppliers, aliases and store contacts.
(A little extra information for those who don’t know: aliases refer to the search terms used in your shop. They can be found on page Shop Parameters >> Search.
Store contacts, in turn, can be managed under the “Stores” tab in the “Shop Parameters” >> “Contacts” section).
Preparing Files for Importing
Starting from version 1.7, PrestaShop supports importing data from files in several formats including .csv, .xls, .xlsx, .xlst, and .ods. The older versions supported only .csv files. Among all these, .csv files are the most commonly used for data import/export. They can be easily created and edited with Excel, Google Sheets, or any text editor.
Preparing your import files correctly is very important. Ensure your data is clean, well-structured, and free from errors. Each data type (like products, customers, etc.) needs specific columns and data formats in your .csv file.
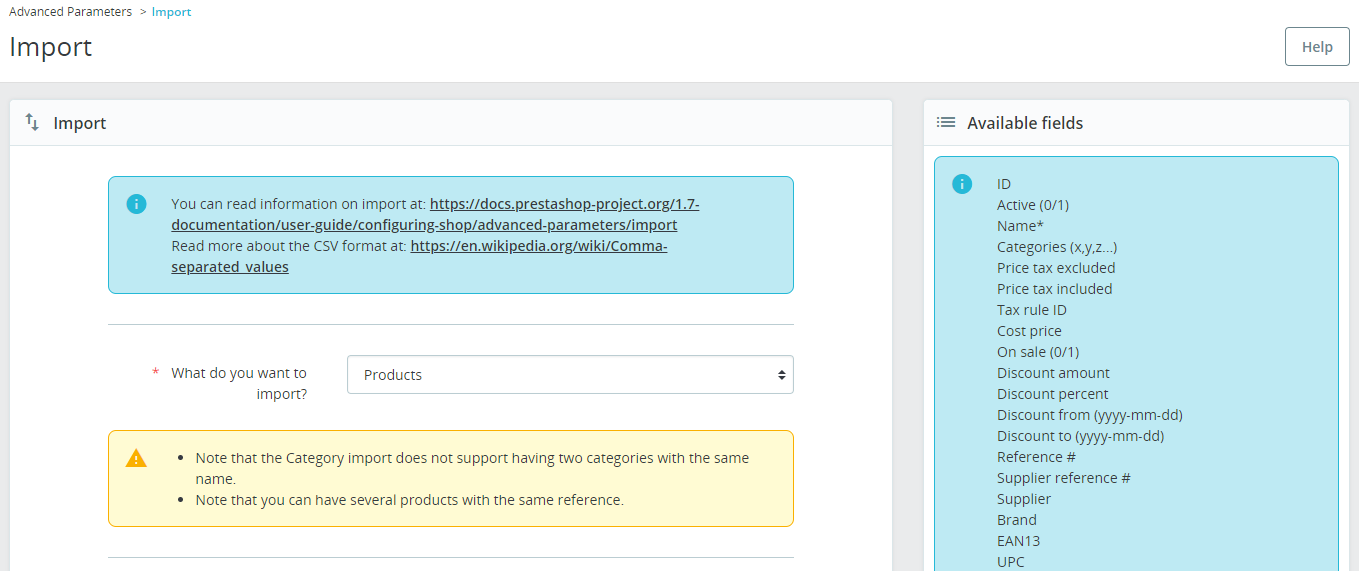
You can see the list of available fields directly on the import page (Advanced Parameters >> Import). Just select the data type to import and you’ll see the list on the right side. There are many fields, you can select the ones you need.
You can also get sample .csv files for import on the same page, look for the “Download sample csv files” block. Another option is to export your existing data and then edit the file. See the section “Exporting Data from PrestaShop” below.
Importing Data in PrestaShop
Here’s a step-by-step guide to importing data in PrestaShop:
- Go to “Advanced Parameters >> Import“.
- Choose the data type you wish to import – products, combinations, categories, customers, addresses, brands, suppliers, aliases, store contacts.
- Upload your data file and set necessary parameters (like language, field separator, etc.).
- On the next step match the columns in your file with PrestaShop database fields.
- If necessary, you can save your current matching configuration for the future use.
- Click on “Import” to begin the process.
It’s important to be aware of potential errors during import. This can include incorrect formatting, duplicate data, or unsupported characters. Reading the error messages can usually give you a hint about what’s wrong.
Exporting Data from PrestaShop
To export data from PrestaShop, follow these steps:
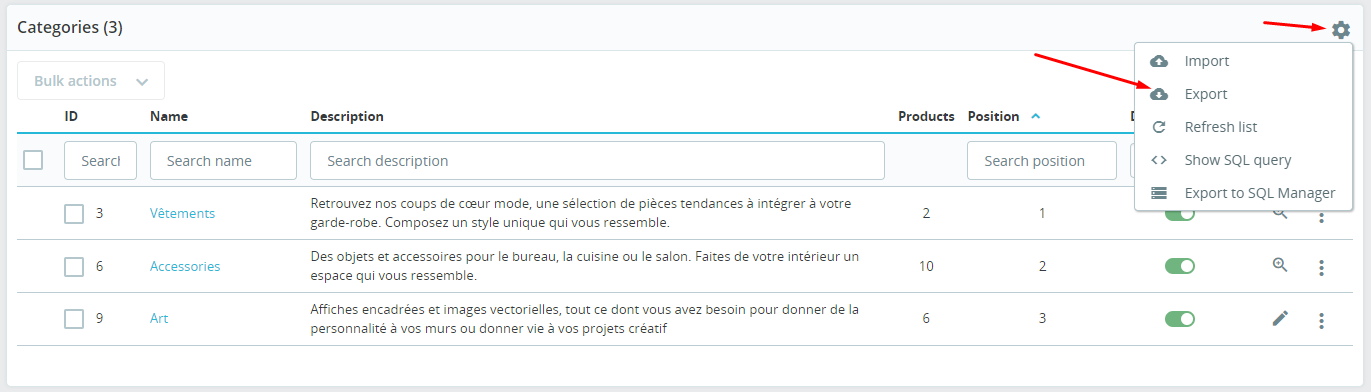
- Navigate to the page of the data type you want to export (for example, “Catalog >> Products” for product data).
- Click on the gear icon in the right top of the list.
- Click the “Export” button to download a .csv file with the data.
Exported data can be used for backups, data analysis, or transferring to another store.
Useful Tips and Best Practices
- Always back up your data before importing.
- Start with a small sample file to check the format and data before importing a larger file.
- Pay attention to error messages during the import process.
- Consider using third-party tools for complex data operations, like scheduled imports or large datasets.
Data Privacy
Data privacy is crucial, especially when handling customer data. Be sure to comply with data protection regulations like GDPR when exporting customer data. Always protect your customers’ privacy and maintain their trust.