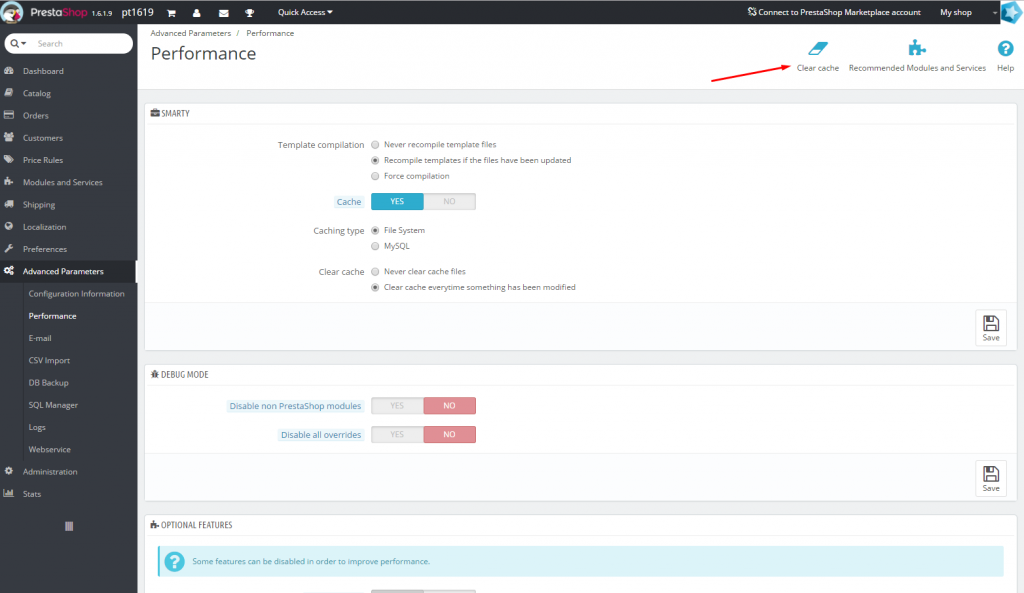
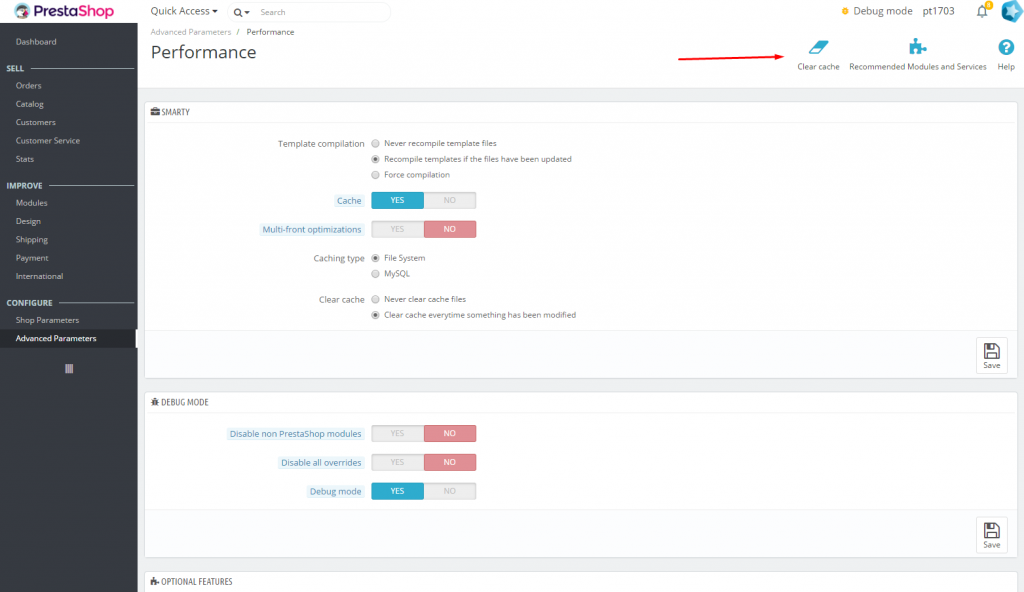
Sometimes you may need to clear the cache of your PrestaShop website. Basically, it’s necessary when you’ve made some changes to your site, but they are not displayed.
This article describes how to clear Smarty Cache and all other cache types.
Clearing the cache in PrestaShop Back Office
- In the Back Office go to the page Advanced Parameters -> Performance.
- Press the button “Clear cache”.
PrestaShop 1.6 PrestaShop 1.7
- All done, cache cleared! Refresh the page you worked on and check the changes.
Manual cache clearing
Sometimes you may need to clear the cache without accessing Back Office.
- Using an FTP client or hosting file manager, go to the root directory of your site on the server.
- Delete content of the following directories (except index.php files):
- /cache/smarty/compile/
- /cache/smarty/cache/
These are main cache directories. Also, if necessary, you can clean the following directories:
- /cache/cachefs/
- /img/tmp/
- /themes/your_theme/cache/
Similarly, delete all files inside these directories, except for index.php files
- Delete file /cache/class_index.php. It is cache of PHP classes. You need to clear it when you make some overrides of classes and controllers.
- Cache cleared. Refresh the page you worked on and check the result.
Disabling cache
You can simply turn off the cache for a while, so that it doesn’t interfere with your work on the site. Don’t forget to enable it back after making changes, it significantly speed up PrestaShop!
- In the Back Office go to the page Advanced Parameters -> Performance.
- Turn on the option Template compilation: Force compilation and toggle “Cache” option to “No”.
- At the bottom of the page in the “Caching” block, turn off the “Use caching” option.
- In the block CCC (COMBINE, COMPRESS AND CACHE) turn off all options. These settings affect the caching of CSS and JS files.
- Save changes
- Cache cleared. Refresh the page you worked on and check the result.


One thought on “How to clear PrestaShop cache”