
Managing vacation profiles in Vacation Mode covers scheduling, multilingual messages, multishop setup, and order email notifications in PrestaShop.
The Vacation mode module organizes holiday notices into vacation profiles – one per tab in the configuration page. This guide covers creating and managing profiles, scheduling activation by date, multilingual content, and optional order email notifications.
Managing vacation profiles overview
What Is a Vacation Profile?
This guide to Managing vacation profiles starts with how profiles are structured.
Each tab on the module configuration page represents one vacation profile. A profile groups together:
- A Description: label (visible only in the Back Office)
- An Activate: switch and optional Dates: range
- All enabled display placements and their messages
- The optional order email placement
On first install, the module creates one inactive vacation profile automatically.
Disable Add to Cart
Each vacation tab includes Disable Add to cart: below Activate:.
- Yes – While this vacation is active for the current shop, add-to-cart buttons are disabled and greyed out and new cart additions are blocked on the storefront.
- No – Default. Purchase buttons behave normally.
This option is stored per shop (pst_vacation_shop.disable_add_to_cart). It does not toggle PrestaShop catalog mode. Customers who already have items in the cart may still reach checkout unless blocked by theme or other modules.
On an existing vacation tab, Disable Add to cart and Show explanation near add-to-cart buttons save automatically when toggled. The Visitor message saves automatically while you type (after a short pause) or when you click Save on a placement block.
Visible only when Disable Add to cart is Yes.
- Yes – Shows a visitor-facing explanation next to disabled purchase buttons (default).
- No – Buttons are still disabled, but no explanation is shown.
Visitor message
Visible when Disable Add to cart is Yes and Show explanation near add-to-cart buttons is Yes.
Enter a short multilingual message explaining why ordering is unavailable. Leave a language empty to use the default text:
Add to cart is temporarily unavailable during our vacation. You can keep browsing – ordering will reopen soon.
Storefront behavior:
- Product page – Full notice below the add-to-cart button.
- Category and search listings – A small ! icon beside each product's purchase area; the full message appears on hover or keyboard focus.
- Other theme locations – The module injects the notice near disabled add-to-cart buttons where your theme renders them.
The explanation is saved per vacation profile and per language.
Technical behavior (what the module changes)
When Disable Add to cart is active, the module:
- Disables purchase buttons via front-office JavaScript and CSS
- Clears add-to-cart URLs in product data so themes cannot submit new items
- Blocks direct add-to-cart requests on the cart page with an error message
- Does not remove products from the catalog or redirect customers away from checkout
Description
The Description: field is a short admin-only label to help you identify the vacation – for example, "Summer break 2026" or "Christmas holidays". It is not shown to customers. Tabs without a description are labeled Vacation #1, Vacation #2, and so on.
Activate:
The Activate: switch controls whether the vacation profile is enabled for the current shop.
- Set to Yes to enable the profile for the current shop. If Dates: are not set, the vacation is active immediately. If Dates: are set, the profile is visible only while the current time falls within that range.
- Set to No to deactivate the profile for the current shop.
Note: Set to "Yes" to activate vacation mode. It will be activated immediately OR in the selected date interval depending on the "Dates" option.
On an existing vacation tab, the Activate: switch saves automatically when toggled.
Creating Additional Vacations
Use these steps when Managing vacation profiles for more than one holiday period.
To add another vacation profile:
- Click the + tab at the end of the tab list (tooltip: Add new vacation).
- Click Create to save the new profile. Placement Save buttons and auto-save for Activate:, Dates:, and Description: are available only after the profile is created.
- Fill in Description:, placements, and messages on the new tab.
- Set Activate: and Dates: as needed.
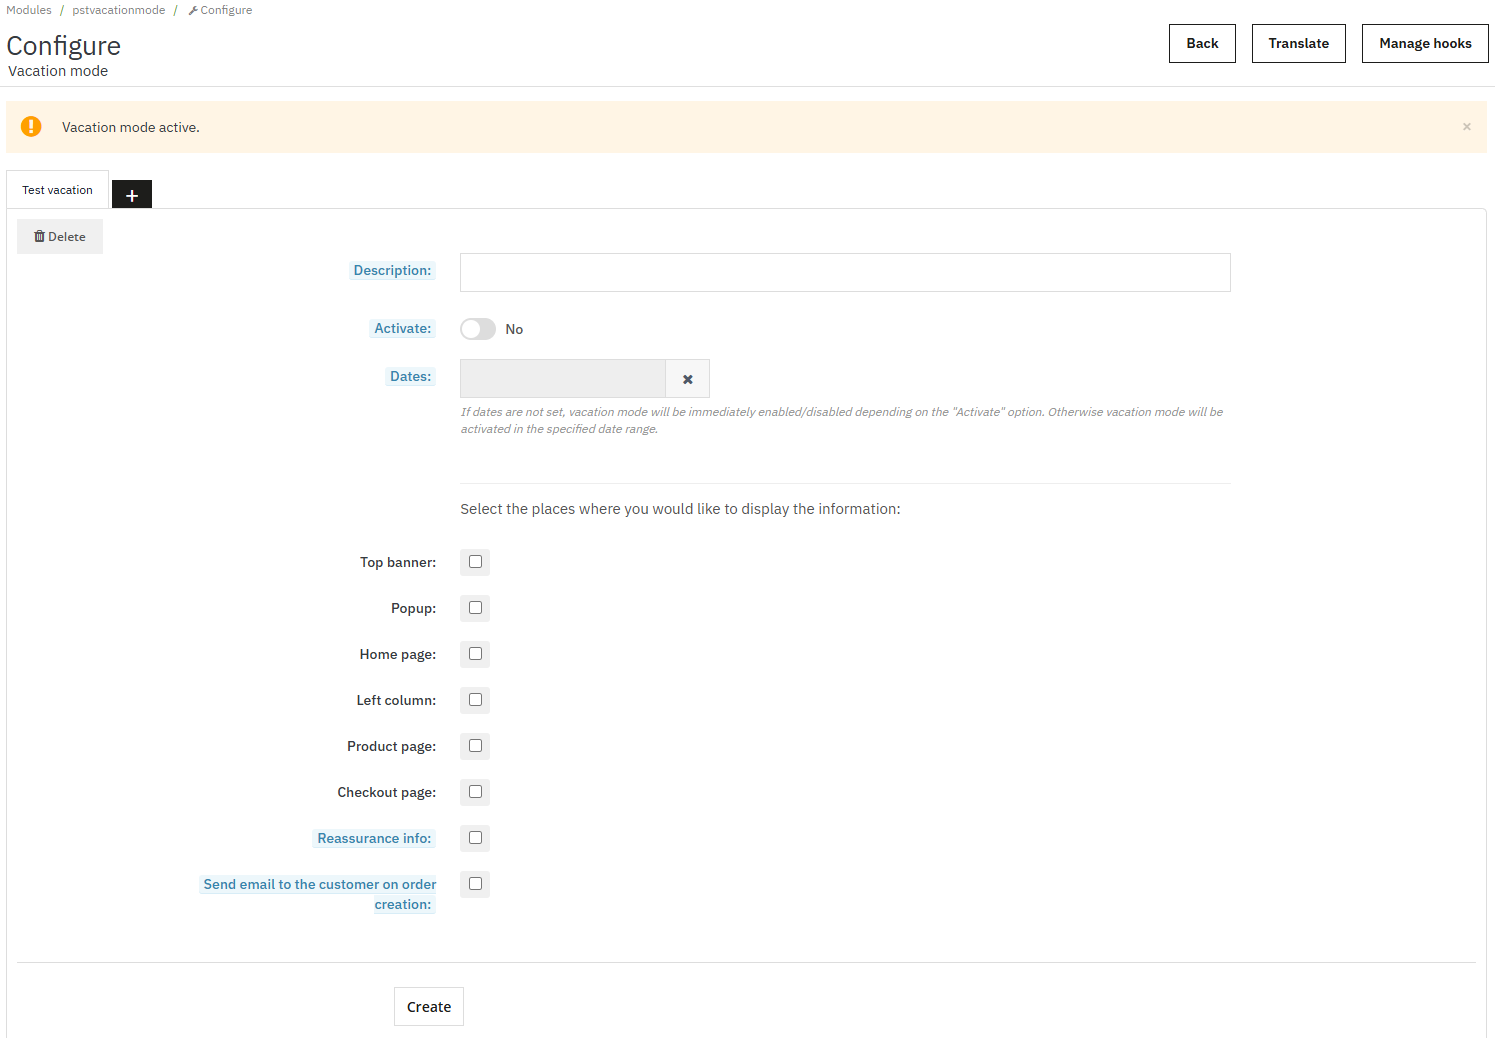
You can run multiple vacation profiles at the same time. When several profiles are active and share the same display placement, all matching messages appear on the storefront.
Deleting a Vacation Profile
When Managing vacation profiles you no longer need, delete the tab to remove all placement data.
On an existing vacation tab, click the Delete button to remove that profile and all its placement data. This action cannot be undone.
Back Office Active-Vacation Indicator
When at least one vacation profile is currently active, an orange Vacation mode badge appears at the top of the Back Office (tooltip: "Your shop is in vacation mode."). Click it to open the module configuration. The badge does not show which profile is active or display date ranges.
On the module configuration page itself, a warning banner appears when vacations are active, showing Vacation mode active: YYYY-MM-DD — YYYY-MM-DD when dates are set, or Vacation mode active. when no dates are configured.
Multilingual Message Content
When Managing vacation profiles in multiple languages, fill every active language on each enabled placement.
Vacation messages support all languages configured in your PrestaShop shop. Use the language dropdown next to each text editor to enter content for each language.
If an enabled placement has text in some languages but not others, the Back Office displays a warning: "%s missing text for %s language." Customers see the notice only when text exists for their language.
Quick Guide
The collapsible Quick guide panel at the top of the configuration page provides setup instructions. Click Hide to collapse it. To show it again, click (show) in the panel heading.
Scheduling Vacations by Date
Managing vacation profiles by date range keeps notices aligned with your shop timezone.
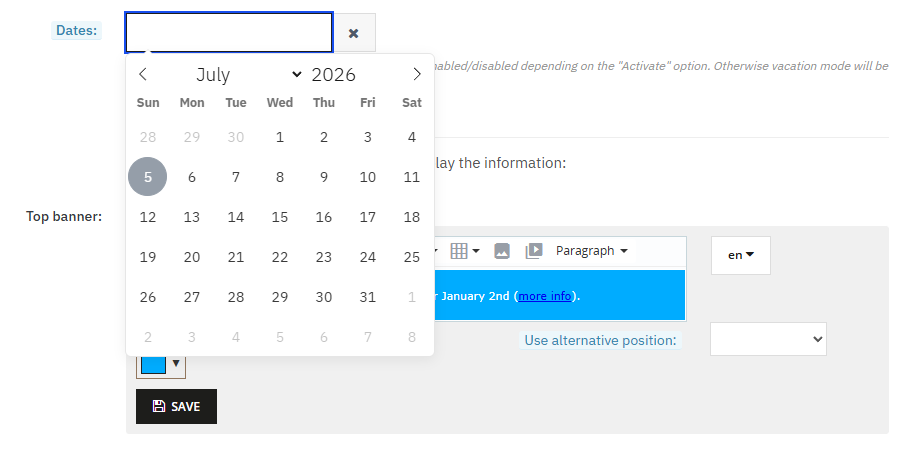
Use the Dates: field to automatically activate and deactivate a vacation profile during a specific period.
How Dates Work
- No dates set: Vacation visibility follows the Activate: switch directly. If Activate: is Yes, the vacation is active now. If No, it is inactive.
- Dates set: The vacation is active only when the current moment falls between the start date and end date, and Activate: is Yes.
Note: If dates are not set, vacation mode will be immediately enabled/disabled depending on the "Activate" option. Otherwise vacation mode will be activated in the specified date range.
The date picker includes a clear button to remove the selected range.
Timezone and End-of-Day Behavior
Dates are entered in your shop timezone (PS_TIMEZONE). On save, the start date is converted to UTC. The end date is set to 23:59:59 on the last selected day in your shop timezone, then stored in UTC. Active and inactive checks use UTC timestamps in the database. The end date includes the full calendar day in your shop timezone.
Planned vs Active Now
A vacation with future Dates: and Activate: set to Yes is configured but not yet visible on the storefront. It becomes active automatically when the start date arrives and deactivates after the end date passes.
Multishop
See the PrestaShop multistore documentation for switching shop context in the Back Office.
In a multishop setup, Activate: is saved per shop. Switch to the appropriate shop context in the Back Office before configuring vacations for a specific store.
Front-Office Cache
After Managing vacation profiles settings, allow a moment for cache clearing before checking the storefront.
Storefront messages are cached with a key derived from the next vacation start or end boundary for the current shop (falling back to an hourly key when no boundary is upcoming). When you save a placement or change vacation settings, the module clears its template cache so changes appear without waiting for the boundary. If you still see outdated content, clear the PrestaShop cache from Advanced Parameters → Performance.
Order Email Notifications
Order email setup is part of Managing vacation profiles when you want post-purchase notices.
The Send email to the customer on order creation: placement sends a supplemental email when a customer places an order during an active vacation. It does not replace PrestaShop's standard order confirmation email.
Enabling Order Emails
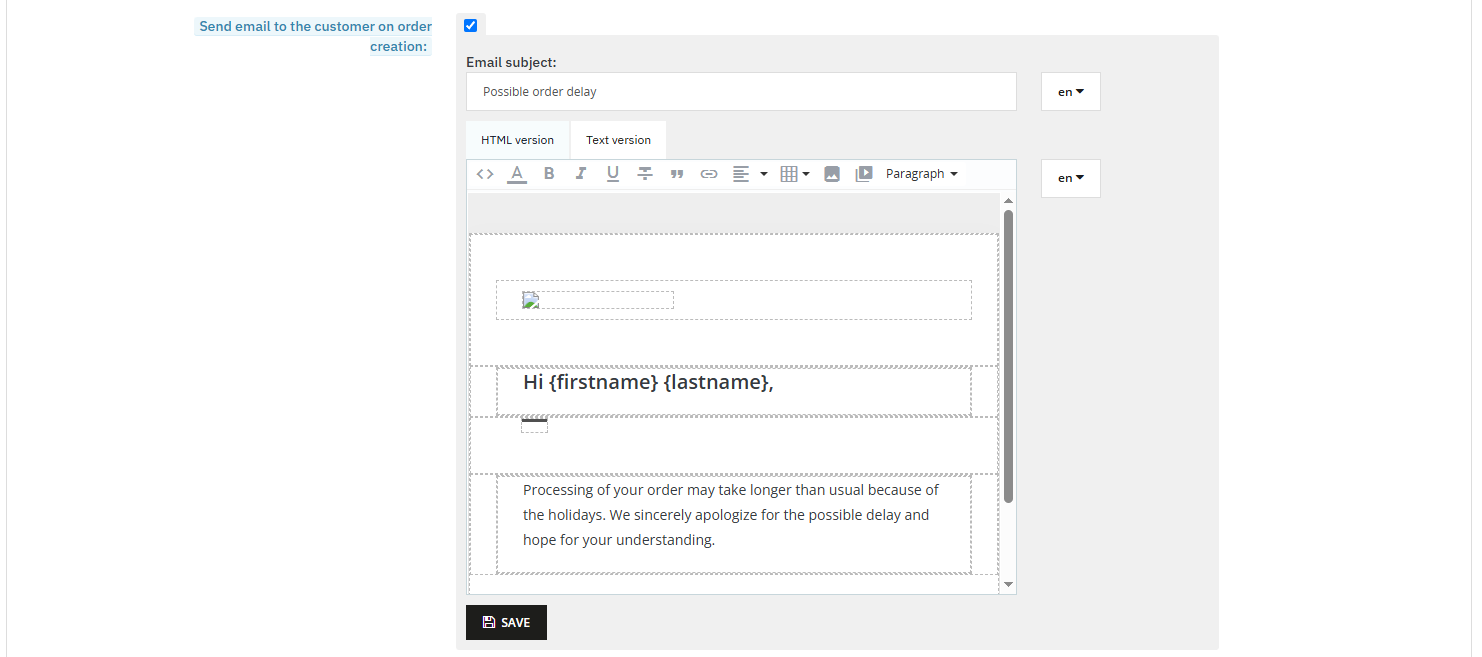
- On a vacation tab, check Send email to the customer on order creation:.
- Enter the Email subject: for each language (default: "Possible order delay").
- Edit the HTML version and Text version of the email body using the tabs below the subject field.
- Click Save.
Note: If several active vacation profiles have order email enabled, a customer may receive one supplemental email per profile when placing an order.
Note: Send the info in additional email when customer places an order.
Email Templates and File Permissions
When you save, the module writes email template files to:
modules/pstvacationmode/mails/{language}/vacation{id}.html
modules/pstvacationmode/mails/{language}/vacation{id}.txt
The {id} is the vacation profile ID. The mails/ directory and its language subdirectories must be writable by the web server. If not, the Back Office shows:
Please make the "mails" directory and its content writable:
Ensure write permissions on modules/pstvacationmode/mails/ before enabling order emails.
Default template content is loaded from vacation.html / vacation.txt (English) or localized defaults:
vacation_de.html|txt– Germanvacation_es.html|txt– Spanishvacation_fr.html|txt– Frenchvacation_it.html|txt– Italianvacation_pl.html|txt– Polishvacation_ru.html|txt– Russian
If no localized default exists for a language, the English vacation.* files are used.
Email Variables
The email supports these variables in the template:
{firstname}– customer first name{lastname}– customer last name{email}– customer email address{subject}– the email subject text
Standard PrestaShop mail tags such as {shop_name} and {shop_url} are also available in the template files.
When Emails Are Not Sent
The supplemental email is not sent when:
- The order is placed with an Error order status
- The order is placed with a Canceled order status
- The customer's email address is invalid
- No active vacation profile has Send email to the customer on order creation: enabled
Default Email Content
The default text version reads:
Processing of your order may take longer than usual because of the holidays. We sincerely apologize for the possible delay and hope for your understanding.
Customize this in the HTML version and Text version editors before saving.
Troubleshooting
Use this checklist while Managing vacation profiles if something does not work as expected.
| Issue | What to check |
| Disable add to cart not working | Disable Add to cart: is Yes, vacation is active for current shop, dates are valid. Clear FO cache and theme asset cache. Check product page for greyed-out buttons. |
| Visitor explanation not visible | Show explanation near add-to-cart buttons is Yes, Visitor message is filled (or default applies). Clear FO cache. On listings, look for the ! icon and hover it. |
| Vacation not visible on storefront | Activate: is Yes, dates are valid (or empty), placement is enabled and saved, text exists for customer's language. See Display Locations troubleshooting. |
| Vacation active but should not be | Check Dates: range and Activate: switch. Future start dates mean the vacation is not yet active. |
| Order email not sent | Placement enabled and saved, vacation is active, mails/ directory writable, order status is not Error or Canceled. |
| "mails directory writable" warning | Set write permissions on modules/pstvacationmode/mails/ and language subfolders. |
| Missing translation warning | Fill in text for all active shop languages on each enabled placement. |
Related Guides
- Review display placements, styling, and hook positions in the Display Locations Reference.
- Return to the Main Documentation.


